- 01Pi + OS
- 02Vendor camera example
- 03OpenCV frame
- 04QR decoder
Choose the equipment from the job
A CrowPi 3 combines a screen, a camera and learning hardware. Its basic kit and Raspberry Pi bundle are different purchases. Check the current package list, board, power supply and OS instructions before choosing one. A Linux computer and camera you already own can also do this project.
The program consumes OpenCV frames. Verify the camera with the vendor's example first. Do not assume every CSI camera is available through cv2.VideoCapture(0): an image pipeline such as Picamera2 may need a different adapter. Use the image-input path until your particular camera can supply frames.
Make capture a separate experiment
On Raspberry Pi OS or Debian with the standard package available, install OpenCV using the OS package manager:
sudo apt update
sudo apt install python3-opencv
python3 -c "import cv2; print(cv2.__version__)"
First use a local image containing your marker:
python3 camera.py --image marker.png --output trial.jsonlThe download includes marker.png containing CRIGOR:BOX_A. Print it or use it as the image input. The application does not download images.
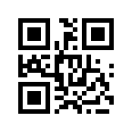 The log should gain one event for an allowed decoded marker and no event for a blank image. Camera mode is
python3 camera.py --device 0 --output trial.jsonl once that device has been verified.
Check the boundary
An unavailable device or unreadable frame is a capture failure. It is not a marker reading of zero. Record the camera model, OS, OpenCV version and device index that actually work for you.